Tuesday, April 26, 2016

Drawings


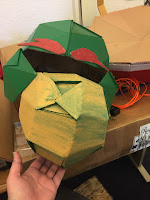
My drawings are mainly done in the medium of graphite(pencil) with a few having been done with colored pencils.  I am still practicing mixing/blending colors with colored pencils. I have drawn multiple portraits, usually for and of the family, as well as other photos that I have turned into drawings, such as family pets(3rd photo).  Most of my drawings are free hand, but the perspective drawings (2nd photo) are done with a ruler in order to get the straightest line possible and some of the portraits are done using the grid method to make sure that everything is in the correct space and correct proportions, since I am still learning just where to put certain features relative to everything else, even if it may look weird in the photo or something.  Again these are only a few examples of my drawings, I also have a physical portfolio containing more drawings.


Henna


        I have always loved henna, or Mehndi, designs that are used in India and a few other middle eastern countries.  All of the designs shown here are done by me and on myself.  I have mentioned  the Mehndi culture in a previous post with a little more background on the use of henna. The first photo is of a fresh henna stain while the last photo is a fully darkened stain.  The other two photos are during the drying process of the henna paste before it is removed to reveal the fresh stain.  When I do the designs I am often using at a reference photo, I may not copy the design exactly but it at least will get me started on drawing the design and going from there in doing what I want to do in order to make the design more of my own.

Wednesday, April 6, 2016

Real Life Video Game- Mario IRL


     In this class project, a total of five games were chosen and based on the popular Nintendo game Mario Party and its mini-games. My group consisted of three people and we chose the mini- game Hot Rope Jump to bring to life and renamed it as Jumping Over Poverty.  These games that we recreated were recreated in the sense that they brought more awareness to certain things going on in the world, ours being about the poverty line and how hard it can be to stay above it.
   Shown above are our characters that participants of the game can chose from and to wear while jumping and trying to stay above the 'poverty line'. These characters that we choose are Podoboo, Thwomp, Baby Bowser, and a Koopa Shell.  As the hosts of the game, my group members and I wore a green or red shirt and blue painter's suits as overalls to resemble the Mario brothers, Mario and Luigi.
   Below the characters to chose from are a few pictures from the event and a few of the groups of people that participated.  We were surprised that we got anyone to play because we began to spread the word of the event so late and close to the date of the event.  This event of Mario IRL was actually quite successful, with each group getting a few groups of people to play their games.
   Overall planning this event and getting the costumes and game materials put together it took a lot of time and patience in order to finish everything well and on time, but in the end it was worth it because the event was actually successful in getting people to play and join in on what we were doing.  I know that some groups had issues with their group members and working in the group as a whole, but I believe that my group worked well together, and because we worked well and each did our part in the project we were able to finish all of our pieces and obtain everything we needed for our mini-game.

Thursday, March 17, 2016

Photography

These are a few photos that I have taken over the years. I don't necessarily consider myself to be a photographer in any way because it's not a main focus of mine when it comes to my art work, but I do have a good handful of photos that I have taken that I really like and are proud of, and these are just a few examples.  Some of them have been run through a filter through apps on my iPhone.  I like to find photos that maybe don't have the greatest composition to begin with and then add the filters to add to the photo and make it look better in its overall composition.  I love flowers in bloom, these are a main focus in my photographs when I do take photos that aren't for the sake of capturing a memory on a family trip or day with friends.  I mostly take color photos, I don't really create black and white images, mainly because these photos are taken with my iPhone and by putting them through a b&w filter, any sort of color captured in the photo that made it beautiful, for me, is now gone and it becomes something of a simple photo rather than what the original coloring and lighting brought to the photograph. As seen in the first picture though, I will create photos where the background is black and white and the foreground of the photograph is kept in color.  These photos can be very powerful when highlighting something specific in the foreground, or even background, of an image.
When I do take photos, good or otherwise, I like to take them of just about anything even though a primary focus does tend to be flowers, because they are just every where and so beautiful when in bloom and I really like to capture that moment, especially on a sunny day.


Monday, December 7, 2015

Video Projection


       For this video projection project I wanted to create something that could work with and be displayed in pretty much any space.  Because of this detail I knew that I had to chose a design or picture that was relatively simple, and yet it would still add to the space.  I love the Mehndi (henna) cultural designs that are used in India for ceremonial purposes, but it has become popular as a form of a temporary tattoo here in the States, so there are many different types of designs to choose from.  The three designs that I chose for this projected video were found on the internet and hand drawn by me, as well as being slightly altered from the original.  It is a stop-motion video, meaning each time something appears it is a new photo, each being created in Adobe Photoshop and put together in Adobe Premiere.  Although I created something that I knew could be put almost anywhere, the spot that I did choose was a more secluded area, but I knew that people still went by and through that area all the time, so even though this may not be a place that is out in the open for everyone to see and notice, I knew that it would still be seen because of how many people actually walk through this secluded area.

Monday, November 2, 2015

Haunted Audio Tour

This Haunted Audio Tour will begin on campus next to Morrill Hall on the opposite side of the Sarah Fleischmann building and end in front of Lincoln Hall after walking along the east side of the campus.  This tour will take about 10-12 minutes.

Before we begin:
Take a look at the map in order to learn the route of this Haunted Audio Tour.  We will be beginning this tour on the west side of Morrill Hall near the Honor Court on campus.  Listen to to the audio to learn where to go next, when to stop (and listen), and where the tour will end. Specific directions will not always be given as to where to go next, so it is best to learn the route well in order to know where to go when you are told to continue moving. This tour is meant to be walking, at a normal pace, most of the time with only a few stops before reaching the end destination.

There is a round of screams at at the end of the tour in order to signal that the tour is over.

Monday, October 12, 2015

Diptych Video


        For this diptych video project my final soundtrack ended up having more of an up-beat sound to it, as well as every day sounds.  So for the video to match the audio I took snippets of my life in which I listen to music the most and put that in the video, this mostly included listening to music in the car and in my room doing daily chores and other activities.

Monday, September 28, 2015

Mixed Sound Piece


This is the complete audio mix that I created using the found sound audio loop, voice sound, Marclay cut up pieces of vinyl record and my homemade musical instrument.   Unlike others I didn't want to distort the sounds too much to where they couldn't be made out as individual pieces that still work as a whole.  The voice sound was distorted the most in a sense of changing each quote to have either a higher or lower pitched sound as well as being slowed down or sped up.

Wednesday, September 16, 2015

Marclay Cut-Up Records


     My Marclay cut-up records consist of one off-balanced played record and one cut-up and glued/taped back together in order to create my own mix of the songs from two vinyl records.  This mix only consists of two vinyl records that were cut up and then put back together in a different order and intermixed.

Wednesday, September 9, 2015

Musical Instrument


       The musical instrument that I created is a thumb piano, or a Kalimba.  This homemade instrument is made out of half a shoe box and popsicle sticks hot glued to the top.  At first I wanted to be able to tune the instrument but due to the popsicle sticks not being flexible enough and possible because of how thick they are, it became to complicated and I had to simply glue them on at different lengths.  It also became hard to tune them in any way because when plucked the note shown on the tuner wasn't consistent enough to say that that was the note. or pitch, being played.  So there is a noticeable change in tone on each stick when plucked, but it isn't tuned to any specific note.
       After watching multiple tutorials on how to make this instrument i finally decided to follow one and do the best that I could with the materials that I had.   Most people would make their thumb pianos out wood for a base and small pieces of metal from an old rake and tune them to specific notes, there were some people who had also used popsicle sticks, which are the ones that i paid attention to the most because I knew that they were what I wanted to use. 
       This project at first seemed like it would be difficult, but once I knew what I wanted to make and what materials I wanted to use, it became pretty simple to do.  I do think that there could have been some changes made to how I prepared the box before gluing on the popsicle sticks in order to give it a better sound and possibly more volume when played.